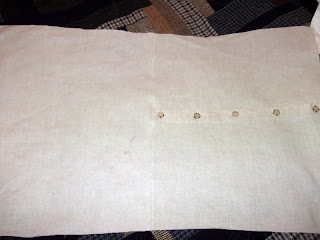
Here is how I did it:
1.Get a cushion inner the size you want. Have a shirt in the material, colour and style you want. Make sure it is a button through shirt not a pull on.
 |
| measure shirt for cutting |
 |
| After cutting |
3. Sew the top seam only so that the material becomes a oblong.
4. Add all the embellishments that you want. Sew them along the full length of the material and then it will cover both sides of the finished cushion.
 |
| Front |
 |
| Back - with a perfect opening |
5. Fold the trimmed material in half along current seam line - right sides together. Sew around the other three sides. Then unbutton the buttons, turn inside out and press. Viola your finished cushion. With a perfect opening, professional button holes all matching up - without having to do the hard work yourself.


Aw, Karen, that is so clever, and lovely!
ReplyDeleteLove that you upcycled a shirt. I try to upcycle whenever i can.
ReplyDeleteWhat a neat idea!
ReplyDeleteVery clever refashion!!! The embellishments and lace are co-ordinated beautifully to make a great cushion.
ReplyDeleteHi Karen, Just letting you know I've included your pretty cushion in a roundup of projects refashioned from shirts. I've also added it to our latest linky - Reusing Shirts and Ties. Hope that's OK.
DeleteThanks Pam, great to be encouraged by you. I love your link ups and often go to them for inspiration to see what others have done.
DeleteThat's a great idea. Looks lovely. So quick and simple, very clever.
ReplyDeleteThis was very clever and the end result is so pretty with the lace and ribbon. I am going to remember this!
ReplyDeleteThis is so pretty, great idea!
ReplyDeleteThis is so fab…love upcycling!!
ReplyDelete