We had a fine display of swordsmanship, lots of swashbuckling, a treasure ship commandeered and a great finale. Unfortunately they also killed the audience several times.
Wednesday, June 13, 2012
Pre Dinner Pirate Show
Last night, while waiting for the roast to rest, we were regaled with a pre dinner pirate show by the boys.
Introducing Elijah Schulz as Captain Burabaz and Jakob Schulz as Mumtan. (those were my lines and then I was instructed to sit in the audience)
We had a fine display of swordsmanship, lots of swashbuckling, a treasure ship commandeered and a great finale. Unfortunately they also killed the audience several times.
Tuesday, June 12, 2012
Baked cheesecake
I love baked cheesecake and I am going to be with the girls for a quilting session tonight, so this will be our sweet treat. As you can see from other blog posts I often use the baked cheesecake with other flavours - the last few tries were blackcurrants and redcurrants from the garden. Click here to see - I was impressed with them when I made them!
Anyone have any answers on the biscuit base for cheesecakes? I used 50% more butter in my base than the recipe (an Alison Holst recipe I have adapted) but the base still crumbles apart. At least the base is not the rock hard, can't get a spoon near it, kind. Tips anyone?
Sunday, June 10, 2012
Feijoa and Ginger Jam
1 kg of Feijoa pulp - some years I use a potato peeler to peel them but this year I just scooped the flesh out using a spoon.
900g sugar
Juice and zest of 1 lemon
1/2 tsp tartaric acid
75g chopped up crystallised ginger
Clean your jars and lids and put them into the oven at 100oC to sterilise while the jam is being made.
Put all ingredients into a pot on very low heat and stir until the sugar is dissolved. Turn the heat up and have the jam at a rolling boil. Stir occasionally. When it has reached setting point (I put a dish in the freezer , once cold I put a tablespoon of jam on the dish. If you can run your finger through and the jam stays separated it is ready). Cooking time tends to be around 20 minutes. Put into jars and place lids on immediately.
This jam comes out more like an English conserve as I do not mash the fruit or cook it so long that it pulps.
Enjoy
Saturday, June 9, 2012
Make a gorgeous cushion from a shirt
I have just finished making a lovely cushion from a second hand linen shirt. I bought the shirt for $2 specifically to do this. The inner is a Fairydown feather inner - 16x20inches.
Here is how I did it:
1.Get a cushion inner the size you want. Have a shirt in the material, colour and style you want. Make sure it is a button through shirt not a pull on.
2. Place the cushion on the well ironed shirt (buttoned up) and cut out around (so that you are cutting two layers at the same time) - don't forget to allow for seams. Or measure your cushion size, add seam allowance and then cut that out of the shirt
3. Sew the top seam only so that the material becomes a oblong.
4. Add all the embellishments that you want. Sew them along the full length of the material and then it will cover both sides of the finished cushion.
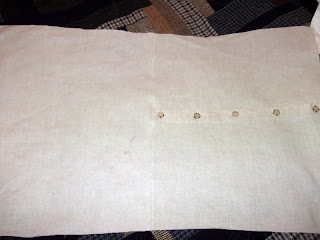
5. Fold the trimmed material in half along current seam line - right sides together. Sew around the other three sides. Then unbutton the buttons, turn inside out and press. Viola your finished cushion. With a perfect opening, professional button holes all matching up - without having to do the hard work yourself.
Here is how I did it:
1.Get a cushion inner the size you want. Have a shirt in the material, colour and style you want. Make sure it is a button through shirt not a pull on.
measure shirt for cutting |
After cutting |
3. Sew the top seam only so that the material becomes a oblong.
4. Add all the embellishments that you want. Sew them along the full length of the material and then it will cover both sides of the finished cushion.
Front |
Back - with a perfect opening |
5. Fold the trimmed material in half along current seam line - right sides together. Sew around the other three sides. Then unbutton the buttons, turn inside out and press. Viola your finished cushion. With a perfect opening, professional button holes all matching up - without having to do the hard work yourself.
Wednesday, June 6, 2012
So thick and still snowing
up to the top of the gumboots |
We have all been back out in the snow several times but Albie finds it too cold. My daft boys are out in t-shirts having snow fight. They have no sense!!! (but do come in when it is getting too cold for them).
I have never seen snow settle on a clothesline! |
trying to show how big the flakes are |
50mm of snow in my rain gauge and still snowing!!!
There is 50mm of rain and snow in my rain gauge and still it is coming. We have had some fun outside though Albie was incredibly unimpressed when he got hit in the face by a snowball that Jakob threw.
Since then we occasionally pop outside but generally are occupied doing other things. Albie has been into the guns and swords with Jakob. Montana-Rose and Eli have been crafty.
Whether Anna and Mark will get to fly into CHCH from their holiday in Rarotonga will remain to be seen.
Monday, June 4, 2012
My little box of treasure
My mother in law gave me this treasure tin on Friday night. I could not for the life of me work out what it was. Then I opened it. Oh glorious glorious buttons. Amazing old ones, all sorts of styles and sizes. What a fantastic gift. There is a story to this. When they moved house (just a couple of months ago as their old house literally fell to bits in the Christchurch earthquakes) they cleared all their bits and pieces. And that included her sewing things and her buttons. I shrieked when I found out. I went through the rubbish bin outside (I mean how desperate was I!!!) and managed to retrieve some, but for the main all her buttons etc had gone to the tip. Oh how I groaned.
Anyway she was out with her tramping group on Wednesday and one of those ladies was permanently moving to Wellington. She too was having a clean out and lamenting that there was no one to give all these collected and useful things to. My mother in law quickly piped up that she had a very willing recipient in mind. And it was me.. oh lucky me... I just love getting treasure like this.
In the kitchen making Feijoa Alcohol!!
So I played around a bit and yes Feijoacello is fantastic!!! Straight on ice, or ice with dry lemonaide or if you want something really alcoholic then with a dry sparkling wine as a top up.
In winter or in summer this gives you a heavenly taste of the feijoa season to come.
To make Feijoacello - my recipe
300 - 500g feijoas
Juice of 1 lemon
3 cups water
4 cups sugar
700ml Vodka ( I use 40% proof but you can use the cheap 20% only keep it in the fridge after making)
Wash the feijoa's and if small cut in half, if larger cut into 3. Put all ingredients into a bowl and stir for the sugar to dissolve. Muddle the fejoa's (that is get a cup or rolling pin or something to give them a bit of a bash). This bruises the skin and releases more of that feijoa flavour. Cover in plastic wrap or put the bowl into a plastic bag and leave on the bench for 48 hours. Strain and put into sterilised containers.
enjoy
In the sewing room - boys shorts
These shorts are for Eli. A couple of weeks ago he had a rugby game in Oxford. On the way home we visited the Fairy and Patchwork shop in Cust. I did not find any material for me but.. Eli found this dog material for him. I bought 1/2 metre for some shorts (what i had not looked closely at was the words are directional and I just had enough material to squeeze the shorts out of). I tried to convince Eli that they would be great as summer PJ shorts but no.. Mr determined said they would be great as shorts to play in.
I cut the shorts out (using an old pj shorts that I chopped for a pattern) that night and then made them when I was away in Hanmer Springs with the girls. Only I get home and Eli told me they were too long and the logo I had put on was too girly. So a trim and a new logo and they have been happily worn ever since. Boy it is good to see something different as boys clothes are sooo samey.
Thursday, May 31, 2012
Recycle / upcycle project - Making gift bags
Anyway I had previously cut all the paper out of a wallpaper sampler book ready to make into gift bags. So I sewed and sewed and sewed!!! It took me about 1 hour to get them all done, but now I have all my wrapping for gifts done for the year.
I take the simple approach. Sew two similar sized sample pieces together. Then when the gift is in I punch holes in the top and either thread homespun wool through or a ribbon to tie them off.
I have seen on-line where people get really fancy and make them have proper bottoms etc - yes they look lovely but Oh they take so long!!!
Tuesday, May 29, 2012
Tips on making the double hourglass quilt
As I have said in some other posts I have a few tips on making the double hourglass quilt, listed by Alison at Cluck Cluck Sew. Refer to her easy to understand instructions but add a few of these tips and you will have a double hourglass quilt of your own, whipped up in a jiffy.
1. It's all about the ironing.
b. Before opening each sewn triangle press the seam in the closed position first. This will set the seam and stop the stretch and buckle happening that can occur when dealing with seams on the bias.
c. When opening the first set of triangles sewn together (after setting the seam in the closed position), press the seam toward the triangle that has the print material.
All of these items will ensure that when you sew blocks together and / or assemble the triangles that the seams will all be in opposite directions so that they butt up closely and form really sharp corners.
2. Use the square rulers you have available
Alison's instructions regarding how to get your quilt triangles the correct size do work well. But I found that I could not cut the material off the template plastic, so had to put my ruler over it to have an edge, then it gets messy.
For using a Jelly roll - 2 1/2" strips I used my 6.5" ruler. The 45deg angle line is aligned to be straight with the bottom of the fabric and then you cut. Just like that.
For a Jolly roll - 1.5" strips I used my 4.5"ruler.
3. Chain piece
It will make the quilt sew a lot faster than getting up and ironing after every small seam.
4. Concentrate on each individual seam as it goes under your presser foot.
Make sure the seam is aligned and butting up. If you have to use pins then put one through each join. If you are confident without them just check each one as it goes through.
Have fun.
1. It's all about the ironing.
a.When sewing the initial coloured strips and solid colour together press the seam to the patterned material. |
b. Before opening each sewn triangle press the seam in the closed position first. This will set the seam and stop the stretch and buckle happening that can occur when dealing with seams on the bias.
c. When opening the first set of triangles sewn together (after setting the seam in the closed position), press the seam toward the triangle that has the print material.
All of these items will ensure that when you sew blocks together and / or assemble the triangles that the seams will all be in opposite directions so that they butt up closely and form really sharp corners.
2. Use the square rulers you have available
Alison's instructions regarding how to get your quilt triangles the correct size do work well. But I found that I could not cut the material off the template plastic, so had to put my ruler over it to have an edge, then it gets messy.
For using a Jelly roll - 2 1/2" strips I used my 6.5" ruler. The 45deg angle line is aligned to be straight with the bottom of the fabric and then you cut. Just like that.
For a Jolly roll - 1.5" strips I used my 4.5"ruler.
3. Chain piece
It will make the quilt sew a lot faster than getting up and ironing after every small seam.
4. Concentrate on each individual seam as it goes under your presser foot.
Make sure the seam is aligned and butting up. If you have to use pins then put one through each join. If you are confident without them just check each one as it goes through.
Have fun.
Monday, May 28, 2012
Quilting weekend in Hanmer Springs
![]() |
Sheryl and Kylie working hard |
![]() |
Paula sorting her split nine patch quilt |
![]() |
Cora had one mother and four aunties this weekend!!! |
Friday, May 25, 2012
Tiny Happy
I have just found a new blog to follow. Tiny Happy - what a fantastic blog and she also has a shop on etsy - http://www.etsy.com/shop/tinyhappy.
Lovely use of recycled material and inspiring!!!
Monday, May 21, 2012
Hodgie Podgie Day
Yesterday we had a family Hodgie Podgie Day (a day out where anyone, including the kids, can stop us to look at something or do something).
So it started with the kids calling in - they went to K-Mart and got some new MGP wheels.
Then we went to Lyttleton and caught the Black Cat Ferry to Diamond Harbour. What a great we ride in gorgeous weather. Poor Morris sat on my knee (well actually tried to crawl inside my skin!) and shook the whole way across. Then we played around at the Godley House Domain. The boys up trees, Aaron decided he could climb too! Not!
We thought we would try the new cafe at the Diamond Harbour Store - HMm - coffee was great and the icecreams so big that the boys could not finish them. But the food was minimal and did not appeal.
Then off for another short walk along the cliff top, back on the ferry and arrived hungry in Lyttleton.
We thought we would try the revamped cafe / restaurant Freemans as seen on the TV about their restaurant expansion going bung in the earthquake. Fanatastic venue. Great food and really amazingly good prices.
Plus at 3.30pm live music started. Very cruisy Jazz by Carmel Courtney and her three piece band.
As soon as we arrived and the staff saw we had children they had a pile of drawing materials on the table . The boys really appreciated that. What a fantastic relaxing day out.
On the ferry |
Aaron proving that he cannot climb trees |
Then we went to Lyttleton and caught the Black Cat Ferry to Diamond Harbour. What a great we ride in gorgeous weather. Poor Morris sat on my knee (well actually tried to crawl inside my skin!) and shook the whole way across. Then we played around at the Godley House Domain. The boys up trees, Aaron decided he could climb too! Not!
Eli was official photographer - us at Freemans |
Then off for another short walk along the cliff top, back on the ferry and arrived hungry in Lyttleton.
We thought we would try the revamped cafe / restaurant Freemans as seen on the TV about their restaurant expansion going bung in the earthquake. Fanatastic venue. Great food and really amazingly good prices.
Plus at 3.30pm live music started. Very cruisy Jazz by Carmel Courtney and her three piece band.
Gorgeous Pizza and handcut fries that were fluffy inside. |
$12 for bread and dips for 4 people!! |
Saturday, May 19, 2012
Melly and Me patterns
Well six weeks ago I was invited to a baby shower. I came home all enthusiastic and started cutting out my Melly and Me patterns. Had them cut and sewn in a night. Then the next few soccer nights I stuffed them. Then it has taken me 5 weeks to get them finished!!! I kid you not. Why does the sewing up and finishing take me so long. Because I PROCASTINATE. Big time!!
So a frantic finishing session last night and they are all done.
My big hint when doing a Melly and Me pattern is that you trace it with freezer paper and then use that, rather than having to cut out plastic templates.
So I have decided "No more procrastination".
Last night I finished the toys, made the vanilla essence (which the ingredients had been sitting on my kitchen bench for three days). It only took 5 minutes.
Made a huge batch of shortbread (the butter had been "softening" on my bench for two days as well!).
Then to finish the night at 9.45pm I cleaned the toilet. Toilets bug me as they get dirty so easily and yesterday I thought yicky so last night I did it before I had a shower and bed. (It did make getting up this morning easier as all those jobs were not still staring me in the face).
I often "relocate" things to another place or put them on my "to do" list. Really it should get done there and then. On the way home from rugby at Oxford today Eli bought 1/2 metre of fabric at the Cust fairy shop and wants shorts/pj pants. I am going to make them tonight before that too sits around for the next four weeks!!!
Lets see what can get achieved with no more procrastination.
Tuesday, May 15, 2012
Double Hourglass Quilt - Finally finished!!
I still felt it was not big enough for the bed (Aaron agreed!!!). But I am over it and it will have to do. It is more of a summer quilt anyway so does not have to cover so much. It is also going to be very hard to quilt as it is soooo big.
Aaron immediately got under it to test try and then we discussed how to quilt it. So that is now the quandry, a good quandry to have.
This quilt and the method came from Cluck Cluck Sew. Though I have quite a few tips re ironing that makes the assembly of the blocks easier. I also tried to make the template occording to her directions but in the end the good old 6.5" square board does the trick.
So with the left overs I am going to make a little quilt for the charity I support, so will take photos and put up my tips later.
Sunday, May 13, 2012
Scooter Safari
Our Pastor - Dennis Isaac, who has been going through operations, chemo and other treatments for cancer has joined in the amazing scooter safari. Go to www.scootersafari.co.nz - fundraising for cancer. Short of a miracle occurring Dennis will not be living a long life but it looks like he is going to take every opportunity he can. Pray for his healing and go look at the scooter tour.
Mothers Day
Happy Mothers day to you all.
I have had a lovely day.
Poor old Jakob has been struck down with the horrible cold that Eli and I have got and was very miserable, so has been in his PJ's all day.
Aaron and Eli made me a gorgeous breakfast. Fresh fruit salad with natural yogurt. It had pineapple, apple, pear, kiwifruit and banana and was exactly what I felt like. Aaron taught Jakob and Eli how to make real coffee using the espresso machine. So I had about four shots of espresso before I went to church. Eli was so proud of it all that he said he was a cafe and brought me in a bill for the service. $0.50 for every coffee and $1 for the fruit salad!!!
I then had to go to church by myself as Jakob was too sick to take. I was giving the sermon today as they wanted a woman to talk. The sermon was about healing. I was very amused that my family were home sick!! It all went well.
We have had a relaxed afternoon as the day has been sunny and fantastic. I sat in the sun on the deck and starting stuffing my last giraffe. They made me croissant and jam and more coffee for a lunch in the sun. I am so blessed being a mum.
I have had a lovely day.
Aaron and Eli made me a gorgeous breakfast. Fresh fruit salad with natural yogurt. It had pineapple, apple, pear, kiwifruit and banana and was exactly what I felt like. Aaron taught Jakob and Eli how to make real coffee using the espresso machine. So I had about four shots of espresso before I went to church. Eli was so proud of it all that he said he was a cafe and brought me in a bill for the service. $0.50 for every coffee and $1 for the fruit salad!!!
I then had to go to church by myself as Jakob was too sick to take. I was giving the sermon today as they wanted a woman to talk. The sermon was about healing. I was very amused that my family were home sick!! It all went well.
We have had a relaxed afternoon as the day has been sunny and fantastic. I sat in the sun on the deck and starting stuffing my last giraffe. They made me croissant and jam and more coffee for a lunch in the sun. I am so blessed being a mum.
Saturday, May 12, 2012
Change of a name
I have been asking for ages as to what I should be calling my blog. The original fromplot2plate was good but the emphasis slowly changed from the garden and food to more crafty pursuits. Most of the names that everyone else suggested were already taken on blogger. So today I spent HOURS trying to get a name I liked that wasn't taken. Then I started a new blog......... Then my IT husband came over and asked what I was doing.
Oh boy, what took me three hours and setting up new stuff he fixed in 3 minutes. I am not joking... 3 minutes!!! He was right that I did not want to lose my followers etc to date and he swapped the name and the url, just like that.
Aren't husbands fantastic.
Oh boy, what took me three hours and setting up new stuff he fixed in 3 minutes. I am not joking... 3 minutes!!! He was right that I did not want to lose my followers etc to date and he swapped the name and the url, just like that.
Aren't husbands fantastic.
Saturday, May 5, 2012
Fresh Homemade English Muffins
Nothing better on a weekend than lovely, hot off the griddle, English muffins.
I originally got a recipe from an old cookbook that my sister had dated about 1932. Since then I have adapted it for the breadmaker (plus some other modifications). Always works.
Gorgeous to eat with homemade jam and cream, chutney and cheese or whatever you want.
The griddle was bequeathed to me by my Nana when she died. My Auntie was required to give everyone what had been listed and I still remember her telling me that I did not have to keep what Nana had put aside for me. She did not think that they were a very good heirloom. I was given this griddle and two cast iron gem irons. I was so thrilled!!! My Nana certainly knew me well, though my Auntie remained mystified that I did not put them in the Salvation Army box!!!
250ml tepid trim milk
1T butter
1tsp salt
2tsp sugar
3tsp dried yeast (i don't use the breadmaker yeast just normal - but either works)
1 cup flour
1 egg
put the breadmaker onto dough cycle and let it mix for about 5-7 minutes. Stop the breadmaker and add 2.5 more cups flour. Allow the breadmaker to do a full dough cycle.
Take the mixture out and put onto a floured surface. Flatten it to about 2 - 2.5cm high. Cut out rounds with a cookie cutter. Put the rounds onto a preheated griddle - must have a very thick bottom. This should be hot and even temperature but not frying heat. I put my griddle onto a gas ring at about 1/2 heat - anymore and the bottoms will burn but the dough will not cook.
You could use an electric frying pan.
Once they are cooked on the bottom - It should be brown on the bottom and looking cooked to about 1/2 way up the side of the muffin (takes 5-10 minutes), turn them over till cooked on the other side. The edges of the muffins do NOT get browned. They should be soft to touch but not uncooked.
Use hands only to pull the muffin apart and put your topping on. Yum Yum
I originally got a recipe from an old cookbook that my sister had dated about 1932. Since then I have adapted it for the breadmaker (plus some other modifications). Always works.
Gorgeous to eat with homemade jam and cream, chutney and cheese or whatever you want.
The griddle was bequeathed to me by my Nana when she died. My Auntie was required to give everyone what had been listed and I still remember her telling me that I did not have to keep what Nana had put aside for me. She did not think that they were a very good heirloom. I was given this griddle and two cast iron gem irons. I was so thrilled!!! My Nana certainly knew me well, though my Auntie remained mystified that I did not put them in the Salvation Army box!!!
My Recipe
Into breadmaker put;250ml tepid trim milk
1T butter
1tsp salt
2tsp sugar
3tsp dried yeast (i don't use the breadmaker yeast just normal - but either works)
1 cup flour
1 egg
put the breadmaker onto dough cycle and let it mix for about 5-7 minutes. Stop the breadmaker and add 2.5 more cups flour. Allow the breadmaker to do a full dough cycle.
Take the mixture out and put onto a floured surface. Flatten it to about 2 - 2.5cm high. Cut out rounds with a cookie cutter. Put the rounds onto a preheated griddle - must have a very thick bottom. This should be hot and even temperature but not frying heat. I put my griddle onto a gas ring at about 1/2 heat - anymore and the bottoms will burn but the dough will not cook.
You could use an electric frying pan.
Once they are cooked on the bottom - It should be brown on the bottom and looking cooked to about 1/2 way up the side of the muffin (takes 5-10 minutes), turn them over till cooked on the other side. The edges of the muffins do NOT get browned. They should be soft to touch but not uncooked.
Use hands only to pull the muffin apart and put your topping on. Yum Yum
Saturday, April 28, 2012
Tidying the vege garden for winter
Trying to use my panorama option on my camera. Have to get a bit better at the matching up bits!! |
The garden is a bit daunting at this time when there is so much to do but small bites of 1 1/2 hours makes a significant difference. Soon I will have to look at the flower garden and trees but at the moment I am just thinking of food!!!!
Subscribe to:
Posts (Atom)
A gorgeous break in Rarotonga
Woo hoo, A holiday with no kids for 11 days. Bliss, relaxing and warm! BTW it was an early 20th wedding anniversary present to ourselves....

-
Mum I have no jersey's. Eek, Jakob has grown and only two things fit. A Merino jersey I made for him last year and a hooded sweatshirt. ...
-
The chutney roasting in the oven My sister in law's book The finished chutney As I mentioned in my ...