I thought I had a finished quilt to show off..... but now I have a Work In Progress (WIP) only.
Yes here is the picture of my lovely finished quilt. This could be called the procrastination quilt as after years I finally put the blocks together and pinned it out for quilting. Then it has sat again as how do you quilt it when there is so much handstitching and machine applique. Trying to work out a pattern just about did my head in.
So I finally stitched in the ditch. Then I auditioned bindings and opted for the best of the lot. It was not what I had in mind, but I could not find any dark grey in my stash, so in my attempt not to buy more fabric I used a stash material. Oh dear I just don't like it.
I have read before of people binding their quilts and then unpicking and putting on a new binding and at the time thought they were daft in the head. I would NEVER do that....... sigh....... last night I unpicked the binding!!!!!
So here it is finally ready to bind. Hopefully it wont sit in the never never pile again.
I link this up to and other places here.
Wednesday, September 18, 2013
Saturday, September 14, 2013
Poo and Pine Cones - every girls dream
Well it goes a long way with me. Pine cones to start those fires that keep me warm in the winter or in the hot tub, and some cow poo that will settle down in the compost and end up in the garden growing my summer food.
Today I collected bags of both stuff.
This blog post could have been titled "the Big Clean Up" - but that is too boring a title. We all went out to my sisters farm as the big storm last week took down 20 macrocapa trees alone their fence line. And they were let off lightly compared to some. Driving past peoples blocks of trees that is their retirement fund and seeing them smashed to the ground is pretty sad.
Anyway out we went with chainsaws and gloves. There are going to be many weekends of chainsawing and wood stacking going on there. The bonus being that there is firewood now for the next 10 years (I kid you not).
Anyway a lovely day out, very satisfying seeing the area that we cleaned up. Piles of wood, the kids had fun... all in all a great Saturday.
Wednesday, September 11, 2013
A new ironing board cover
my gorgeous new ironing board |
A while ago there was a swap for ironing board covers. At the time I thought that I should have participated but I just had too many things going on.
the manky old worn out board |
I also realised that it gets a bit of a workout so I would need a heavier weight of fabric. I knew just what to get as I had seen it in The Make Cafe. So I went online to order and got a bonus free shipping!!! yay
The little embellishing |
Even the underside is neat and matching!! |
I link to these places
Tuesday, September 10, 2013
Upside down propagating
Most definitely growing |
My sister and I have this thing about propagating plants. She swears she cannot do it. I can't see why not.
When I prune etc I just stick some in the ground and next spring they are ready to plant. But my sister swears that nothing she puts in the ground lives. So I often propagate things for her.
No doubt about it being upside down. |
Well this gooseberry is defnitely upside down. I had been looking at it wondering why it looked wrong, then i twigged! It should have been the other way up. As you can see from the branch that is pointing down instead of up and all the buds are pointing down etc.
But blow me down, it is still growing. So I have had to blog about it and skite a bit to my sister.
I link to these places.
Monday, September 9, 2013
A cuddle and a hot soak
Random Sewing
Last night I was super tired and could not really concentrate. I had a broken sleep the night before as I was looking after my 1 year old nephew. But it was only 8pm and too early for bed so I turned the sewing machine on and looked at my scraps.
Now my scraps are not organised, they are not colour coordinated, they are not in neat squares or strips. I have been ready so many people's blogs lately that have such tidy scrap piles. Not me!!!
I keep making things from my scrap bags but they don't seem to reduce, so I thought "right I will just start sewing some together" So I did. I found it really weird not having a definite pattern to think about and trying to jigsaw the pieces together. But I think this may be the beginning of a new quilt.
I had thought of sewing these together and making a ironing board cover BUT then I thought what happens to my ironing with all those bumpy seams?? So that idea got canned.
I link to these places
Thursday, September 5, 2013
A doing day
Today was a day to get things done. I intended to work most of today but the weather got in the way, so I work tomorrow and today I tried to do those things that have been hanging around.
First I went to aquacise with Dawn, it was pretty full on. Then I ...
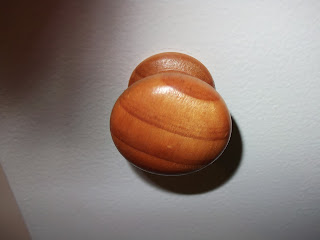
Put Rimu door knobs on the hall cupboard doors. (Saved from when I redecorated Eli's bedroom)
Then I made a pile of crystalised orange peel. Yummy in Xmas fruit mince and hot cross buns. I don't approve of all the imported fruit and veges we have. We can grow our own, we should be supporting NZ growers. So I only every buy oranges when the NZ ones are in the shops. My mother gave me $10 for my birthday specifically for NZ oranges as she knows I love them. So when eating them I kept all the peel in the freezer and today I preserved them.
It is not quite spring and so fruit has not yet come on but we have run out of berry jams. I had some blackcurrants in the freezer, so I pulled them out and made 7 pots of yummy jam.
I then pulled down the Roman Blinds that I had made for our room as they were mouldy and yucky (that is what not having double glazing will give you). So I painted these wood mouldings as the new curtain rails will go on these and then they will be screwed to the walls. I undercoated, then I did two top coats. By the time I go to bed tonight I will have the new curtain rails up.
I completely dismantled the blinds and kept all the bits for some time when I decide to make others.
In amongst all that I did the usual - two loads of washing out on the line and in, mopped the floors, dealt with the kids, did dinner and lit the hot tub............ off for a soak now.
Wednesday, September 4, 2013
A finish and a WIP
All embroidered and embellished |
This was the first time I had juggled my work schedule to attend and I managed to finish a dove for the xmas tree and start a pig.
The back of the dove |
The dove I first covered in white silk. This was then satin stitched around all the edge to hold it onto the pattern last. Then the embellishing starting. Silver thread is couched, sequins and beads attached and a little bit of stitching.
Both these projects are patterned and designed by Jane and the fabrics and threads are dyed by her. I loved having time out during the day to stitch and chat.
I do not need to start any other new projects but all of Jane's work just inspired me so much, I want to do a million things!!
I link to these places
The start of my pig stitchery |
Sunday, September 1, 2013
Baking with the boys - Rice bubble cake
A wee while ago I blogged about baking with the boys and how I am teaching them to follow a recipe. I had set the target of each of them baking once a week to help to make sweet things for their school lunches, but it is working much better at once a fortnight.
Stirring the rice bubbles together |
In the fridge ready for school lunches |
Tonight was Eli's baking time. I had told Rachel at church that this recipe only takes 5 minutes to do. Well it took 7 and that was with Eli doing it.
We had a very busy day with Father's Day. A Fantastic service at church where all the men had a paintball competition with a big bulls eye out the front of the church. Then we spent most of the afternoon at Freeman's in Lyttleton listening to live Jazz - a favourite thing to do.
When we got home Eli still had to do his baking, he put it off this afternoon. So Aaron is on the XBox, Jakob is relaxing in a bubble bath and Eli baked. I think Eli likes baking as he really likes licking the bowls and pots!!
Rice Bubble cake (I originally got the recipe off my friend Delwyn years ago, but it is around everywhere)
Scraping out the bowl |
8 Cups of rice bubbles
7oz butter
8 Tablespoons sugar
3 Tablespoons honey (we use Dirk's Kaiapoi honey)
Put the rice bubbles in a big bowl. Put all the other ingredients in a pot on low on the stove. Let it melt and the sugar dissolve, turn it up a fraction until bubbling. Stir every 30 seconds and watch it bubble and turn golden brown.
Pour mixture into rice bubble and mix really well. Tip into a lined tin (I use an old fashioned sponge roll tin but if your tin is square it will just make the biscuit a bit thicker at the end). Press it really really hard into the tin (TIP - dampen the ends of your fingers before doing this and then it wont stick to you). Cut immediately and put in fridge to set (30 minutes). Store in the fridge and enjoy.
I also have a version of this that is dairy free so good for allergies as no dairy, egg, gluten
Thursday, August 29, 2013
Another Upcycled Merino Boys Top
Yes I have been in my finishing mode again. I cut this jumper out for Jakob about 3 weeks ago. I thought that if I cut it out then I would get it done. But it still languished in my sewing corner.
He had picked the colours about 2 months ago!! He went through my stash of Op Shop Merino jersey's. I then had to sift out which ones would not garner enough material to remake a top. Just like Eli's jersey I used an old Top Kids magazine pattern.
I link to these places
He had picked the colours about 2 months ago!! He went through my stash of Op Shop Merino jersey's. I then had to sift out which ones would not garner enough material to remake a top. Just like Eli's jersey I used an old Top Kids magazine pattern.
I link to these places
Showing off the coloured facings |
Tuesday, August 27, 2013
Belgium Biscuits - the fast and easy way
Our whole family love Belgium biscuits but they take so long to make. Rolling out, cutting, baking, sticking back together ......
So I tackle it a different way and make it in a slice tin. Just as yummy but four times as fast to do.
I use the Edmonds recipe but double it. This will then make a slice in a sponge roll tin. (this has already been doubled)
250G butter
1/2 c brown sugar
2 eggs
4 C plain flour
2tsp baking powder
2tsp cinnamon
2tsp ground ginger
2tsp mixed spice
3/4 cup of jam and a squeeze of lemon juice.
Pink icing made how you like to make icing.
Packet of blackberry jelly (optional)
I link to these places.
So I tackle it a different way and make it in a slice tin. Just as yummy but four times as fast to do.
I use the Edmonds recipe but double it. This will then make a slice in a sponge roll tin. (this has already been doubled)
First cream the butter and sugar well, then add the eggs one at a time. Sift the dry ingredients into this and mix until the crumbs are sticking together and looking chunky - like this
Press just over half the mixture into a baking paper lined tray (I use an old fashioned sponge roll tin)
Soften the jam in the microwave with a good squirt of lemon juice. This should make it runny enough to just pour on and have it easy to move around the slice. If you don't do that the jam is very hard to spread on the biscuit base. Traditionally the jam is raspberry jam - but we ran out of the homemade stuff months ago. What I do still have in the cupboard is blackcurrant jam and that makes a gorgeous tasting slice. Use what jam you like. Pour the rest of the biscuit crumble onto the jam.
Smooth out the crumble and press gently. You want it setting together but not so hard that the jam oozes up through this layer. Bake at 180C for approx 20-25 minutes. Until slightly golden and looking cooked all over.
It is important to add a runny icing as soon as you take it out of the oven. I then sprinkle a packet of jelly crystals on top - just because this is how I have always made it. But you could do hundreds and thousands. Or nothing at all. Once cooled but not cold, cut into slices.
Belgium slice250G butter
1/2 c brown sugar
2 eggs
4 C plain flour
2tsp baking powder
2tsp cinnamon
2tsp ground ginger
2tsp mixed spice
3/4 cup of jam and a squeeze of lemon juice.
Pink icing made how you like to make icing.
Packet of blackberry jelly (optional)
I link to these places.
Subscribe to:
Posts (Atom)
A gorgeous break in Rarotonga
Woo hoo, A holiday with no kids for 11 days. Bliss, relaxing and warm! BTW it was an early 20th wedding anniversary present to ourselves....
-
Mum I have no jersey's. Eek, Jakob has grown and only two things fit. A Merino jersey I made for him last year and a hooded sweatshirt. ...
-
Yesterday I went to the quilt and craft fair in Christchurch . And at a Make area this is what I made. It is a fabulously simple pattern an...